

Showing off your work in the best light possible is so important! With your work being visible online through MLS listings, your website, social media, email, etc., you will be able to win more clients if your stagings are portrayed accurately and professionally through awesome photos.
Having focused on Real Estate Photography since 2010 and being a RESA member since 2011, I’ve seen first hand how important photos are to our businesses and clients. Let’s take a look at some tips to help boost your photo game using the camera you already have.
(P.S. This home had just gone under contract and blemishes were marked with blue tape by the buyers, so you’ll see some of the tape in the example photos.)
Shoot Level
With real estate/architectural/interior photography, we want the resulting photo to be an accurate and true representation of the structure/space we are photographing. If you take a look around the space you are currently in, you’ll notice most (if not all) walls, window frames and door frames are perfectly vertical. Straight up and down! Our photos should reflect that!
Stick with me as we go through some examples. For this first space, I walked up to the space and put my camera up to my eye and because I wanted a photo of the staging decor, I pointed my camera downward.
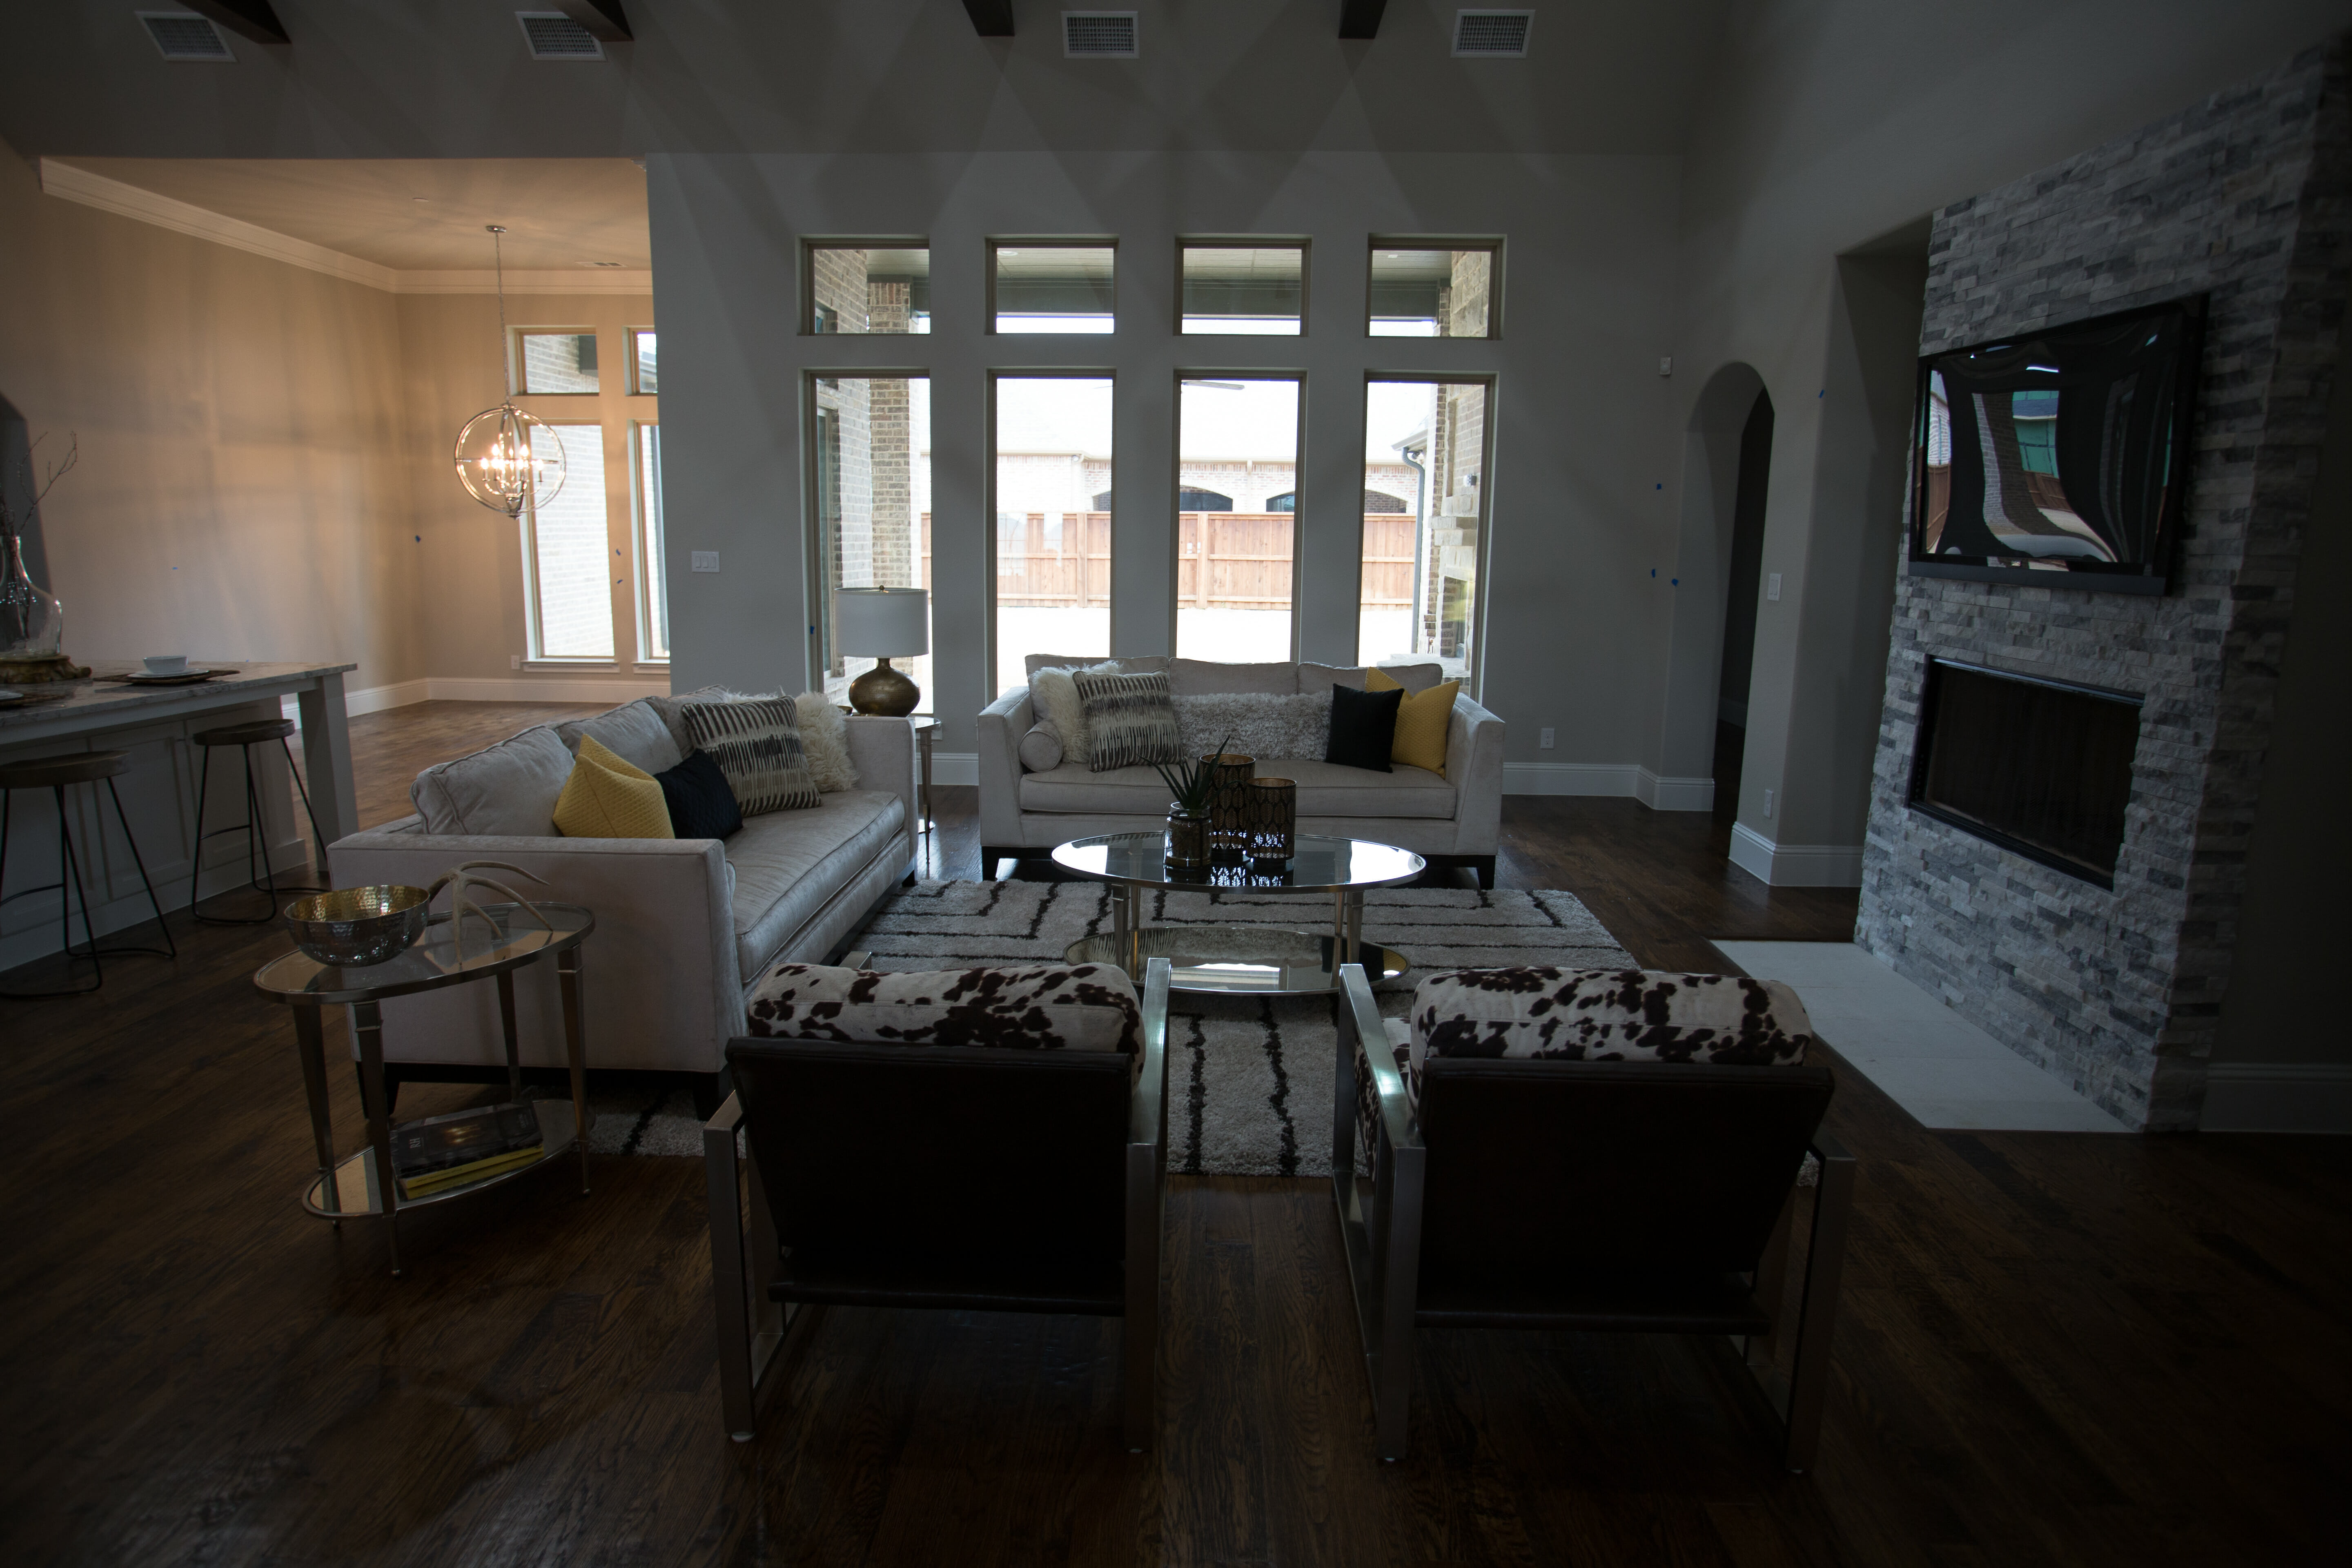
If we take a close look at the windows/framing, we’ll notice that they are tilted or angled. Look at the fireplace on the right – see how tilted the edge of it is? We want to fix that so it is perfectly vertical.
How to Shoot Level
To get all of our windows/framing lines vertical, there’s an easy fix – shoot level! What I mean by that, is we want to take our camera and point it straight forward making it level to the ground. We don’t want to point down like I did in the original shot. Here is the result after focusing on shooting level:
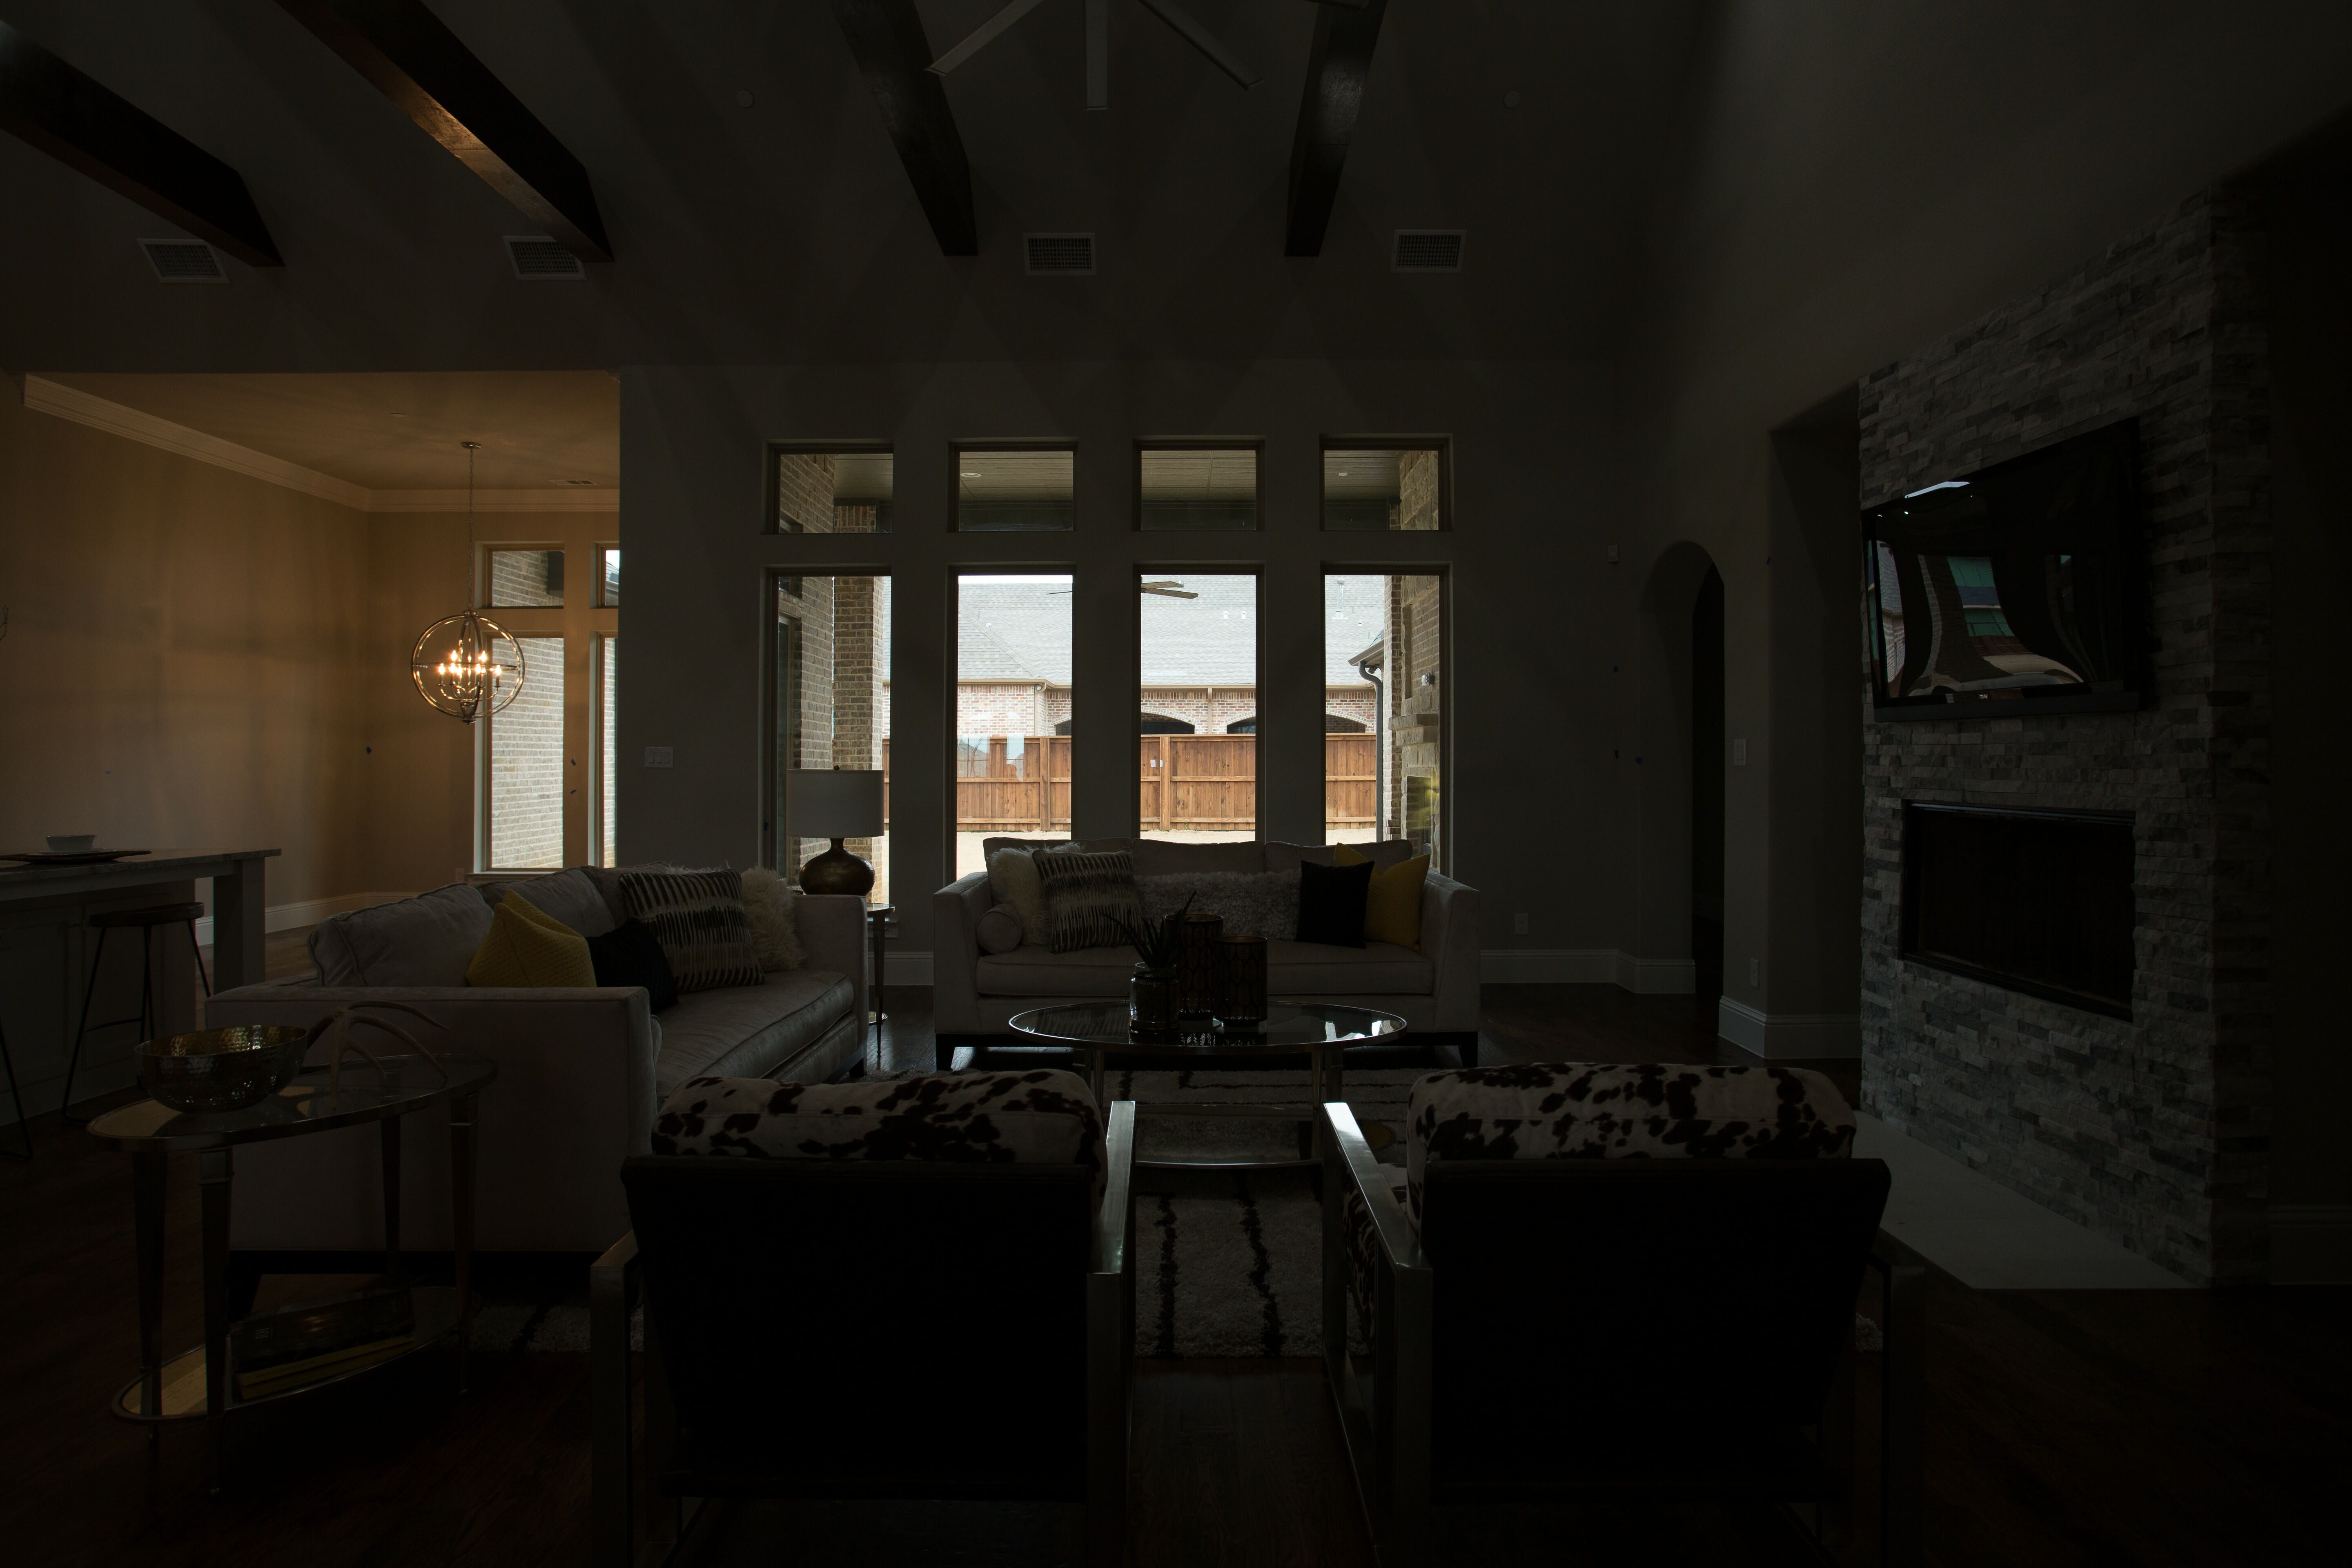
I know this image is dark, we’ll get to that in just a second. See how the windows, door frames and especially that fireplace, are all straight up/down and vertical? No more tilting! It was simply a matter of making sure my camera was pointed level.
Using a Tripod
So how do we make sure we are level? Well you can learn to scan all of the vertical lines while framing your photo and make adjustments on the fly, or if you have trouble seeing them, you can use a tripod that has a bubble level on it. I use a tripod for 99% of my photos because it allows me to easily shoot level, and also gives me a stable platform to put my camera on. If I were to hand-hold my camera I wouldn’t be able to stay steady and would end up with a blurry photo. (Want a cheap, extremely light-weight tripod? Search Amazon for “AmazonBasics 60-Inch Tripod” to see my recommendation.)
Camera Height
So whether or not we are using a tripod, we need to know how high to place the camera. It’s going to depend on a couple of factors. However note that since we are shooting level, we are already pointing the camera higher up than we normally would. So for spaces like living rooms, bedrooms and dining rooms, where furniture is mostly on the lower end toward the ground, we want to shoot from a lower vantage point. I recommend about waist or slightly above waist height. (Another advantage of a tripod – so you aren’t having to crouch down to get your shots!)
When shooting a space that has taller features like in a kitchen where there are upper cabinets, you will want to raise your vantage point to about chin or maybe even eye height. You wouldn’t want to shoot at waist height in a kitchen as you would be shooting directly into the lower cabinets/countertop. So play with the height to see what looks best!
Adjusting Light
When we showcase our work online through photos, we need to be sure they are nice and bright so clients can see our work! You’ll notice in the examples above that they are rather dark and gloomy. The reason? The camera is trying to find an equal balance between the really bright outdoor scene coming through the windows, versus the darker interior space. The camera doesn’t know we really want to focus on the interior, so it just guesses a middle ground. We can control that!
Exposure Compensation
Cameras have something called Exposure Compensation. It’s a way of manually telling the camera “I want you to be brighter/darker than you think you should be”. If you go through your settings on your camera, you should be able to find it represented by a plus and minus sign in a black/white square icon, like below:

You can click on that setting and then adjust the value to the right, which will tell the camera “Hey, make this photo brighter than you normally would”. Doing this, without changing anything else, results in the following of the living room space:

See how much brighter it is? We can now see the interior clearly!
Let’s take a look at another angle for this same space. Here is my first shot where I hold my camera up to my eye, and then point down into the space to showcase the staging.

Notice again how the window frame, the fireplace and the built-ins are crooked/slanted? It’s not pleasing to look at, and our brain tells us something isn’t right! So let’s fix it, by shooting level and while we do that, we’ll bump up our exposure compensation again to a level we think looks the best.
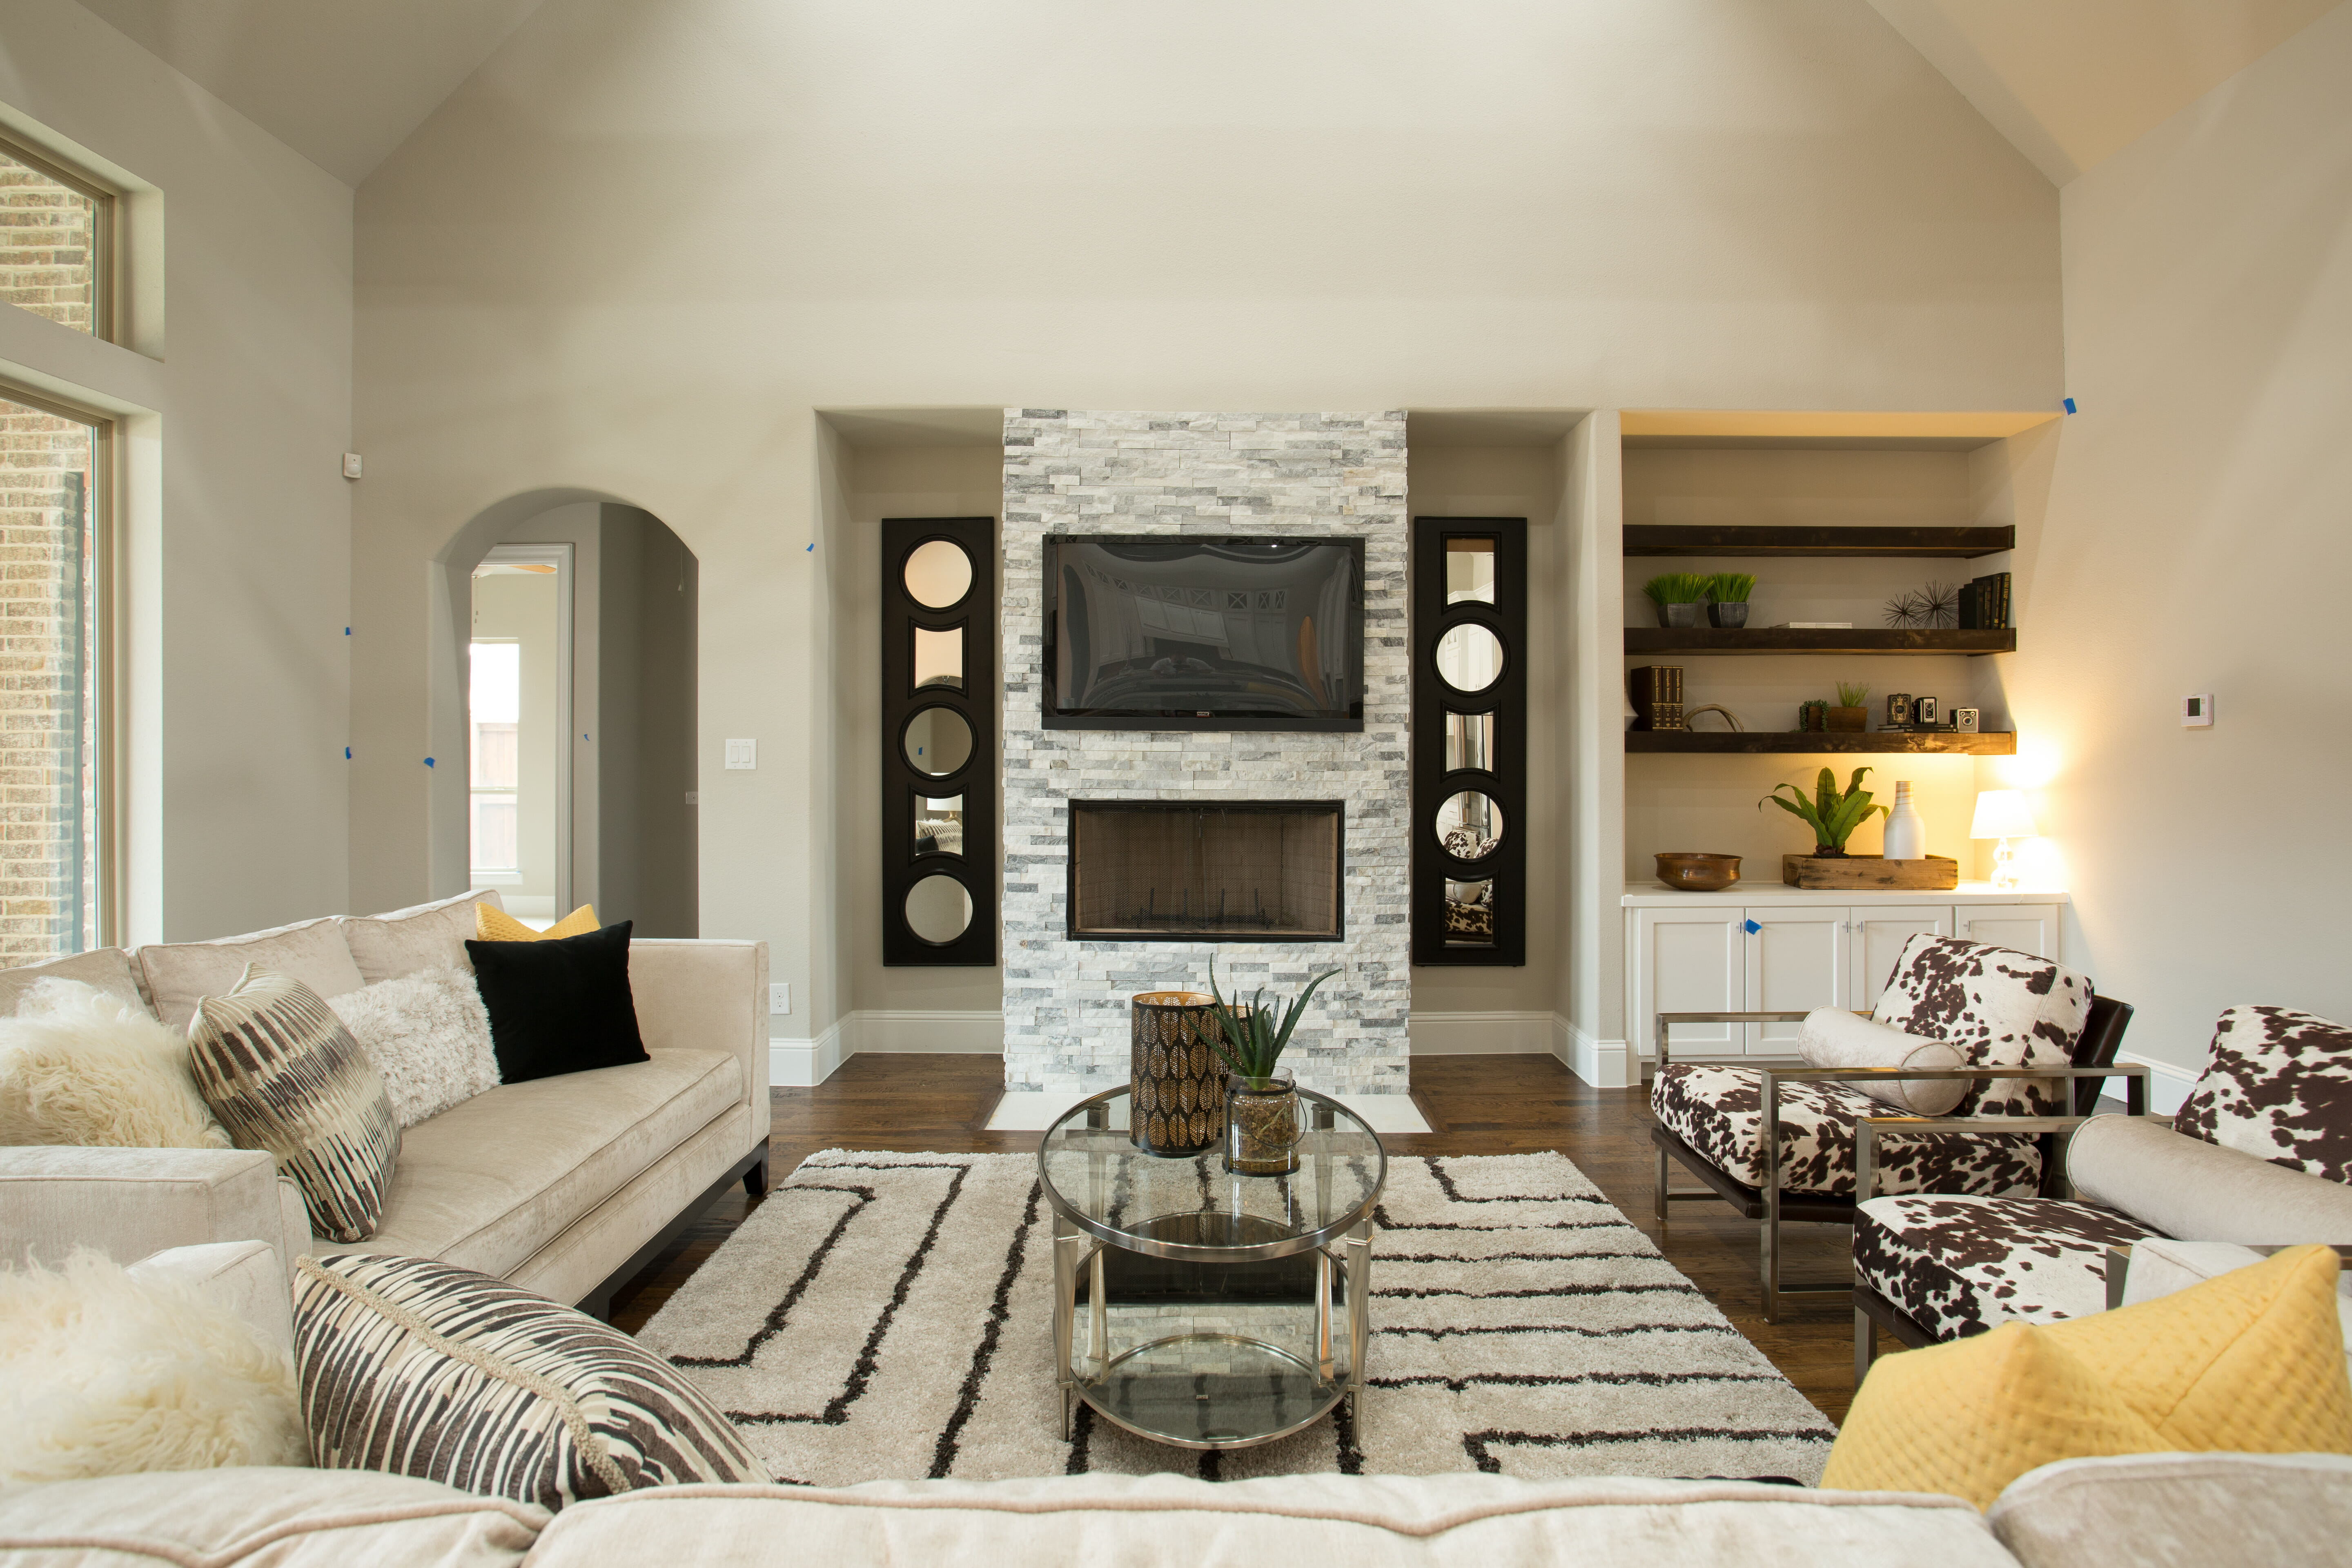
Much better! See how nice this photo looks, simply by shooting level and making sure all of our verticals are accurate?
Interior Lights
One of the things we are able to control is interior lighting. We can choose whether we want them on or off. The choice is really up to us! In my opinion, with the interior lights “on” it brings in warmth and life. However, it also brings in color casts when the lighting hits furniture and items in close proximity. With the interior lights off, the space doesn’t get affected by various light bulb temperatures and allows us to get better color accuracy straight out of the camera.
If you look in most architecture magazines like Architectural Digest, you’ll probably find most of the lights off. I think the reason you see this is because they are more focused on the design of the space and they don’t want distractions with lamps casting unwanted shadows or light. Let’s look at a kitchen shot and examine a couple of things.
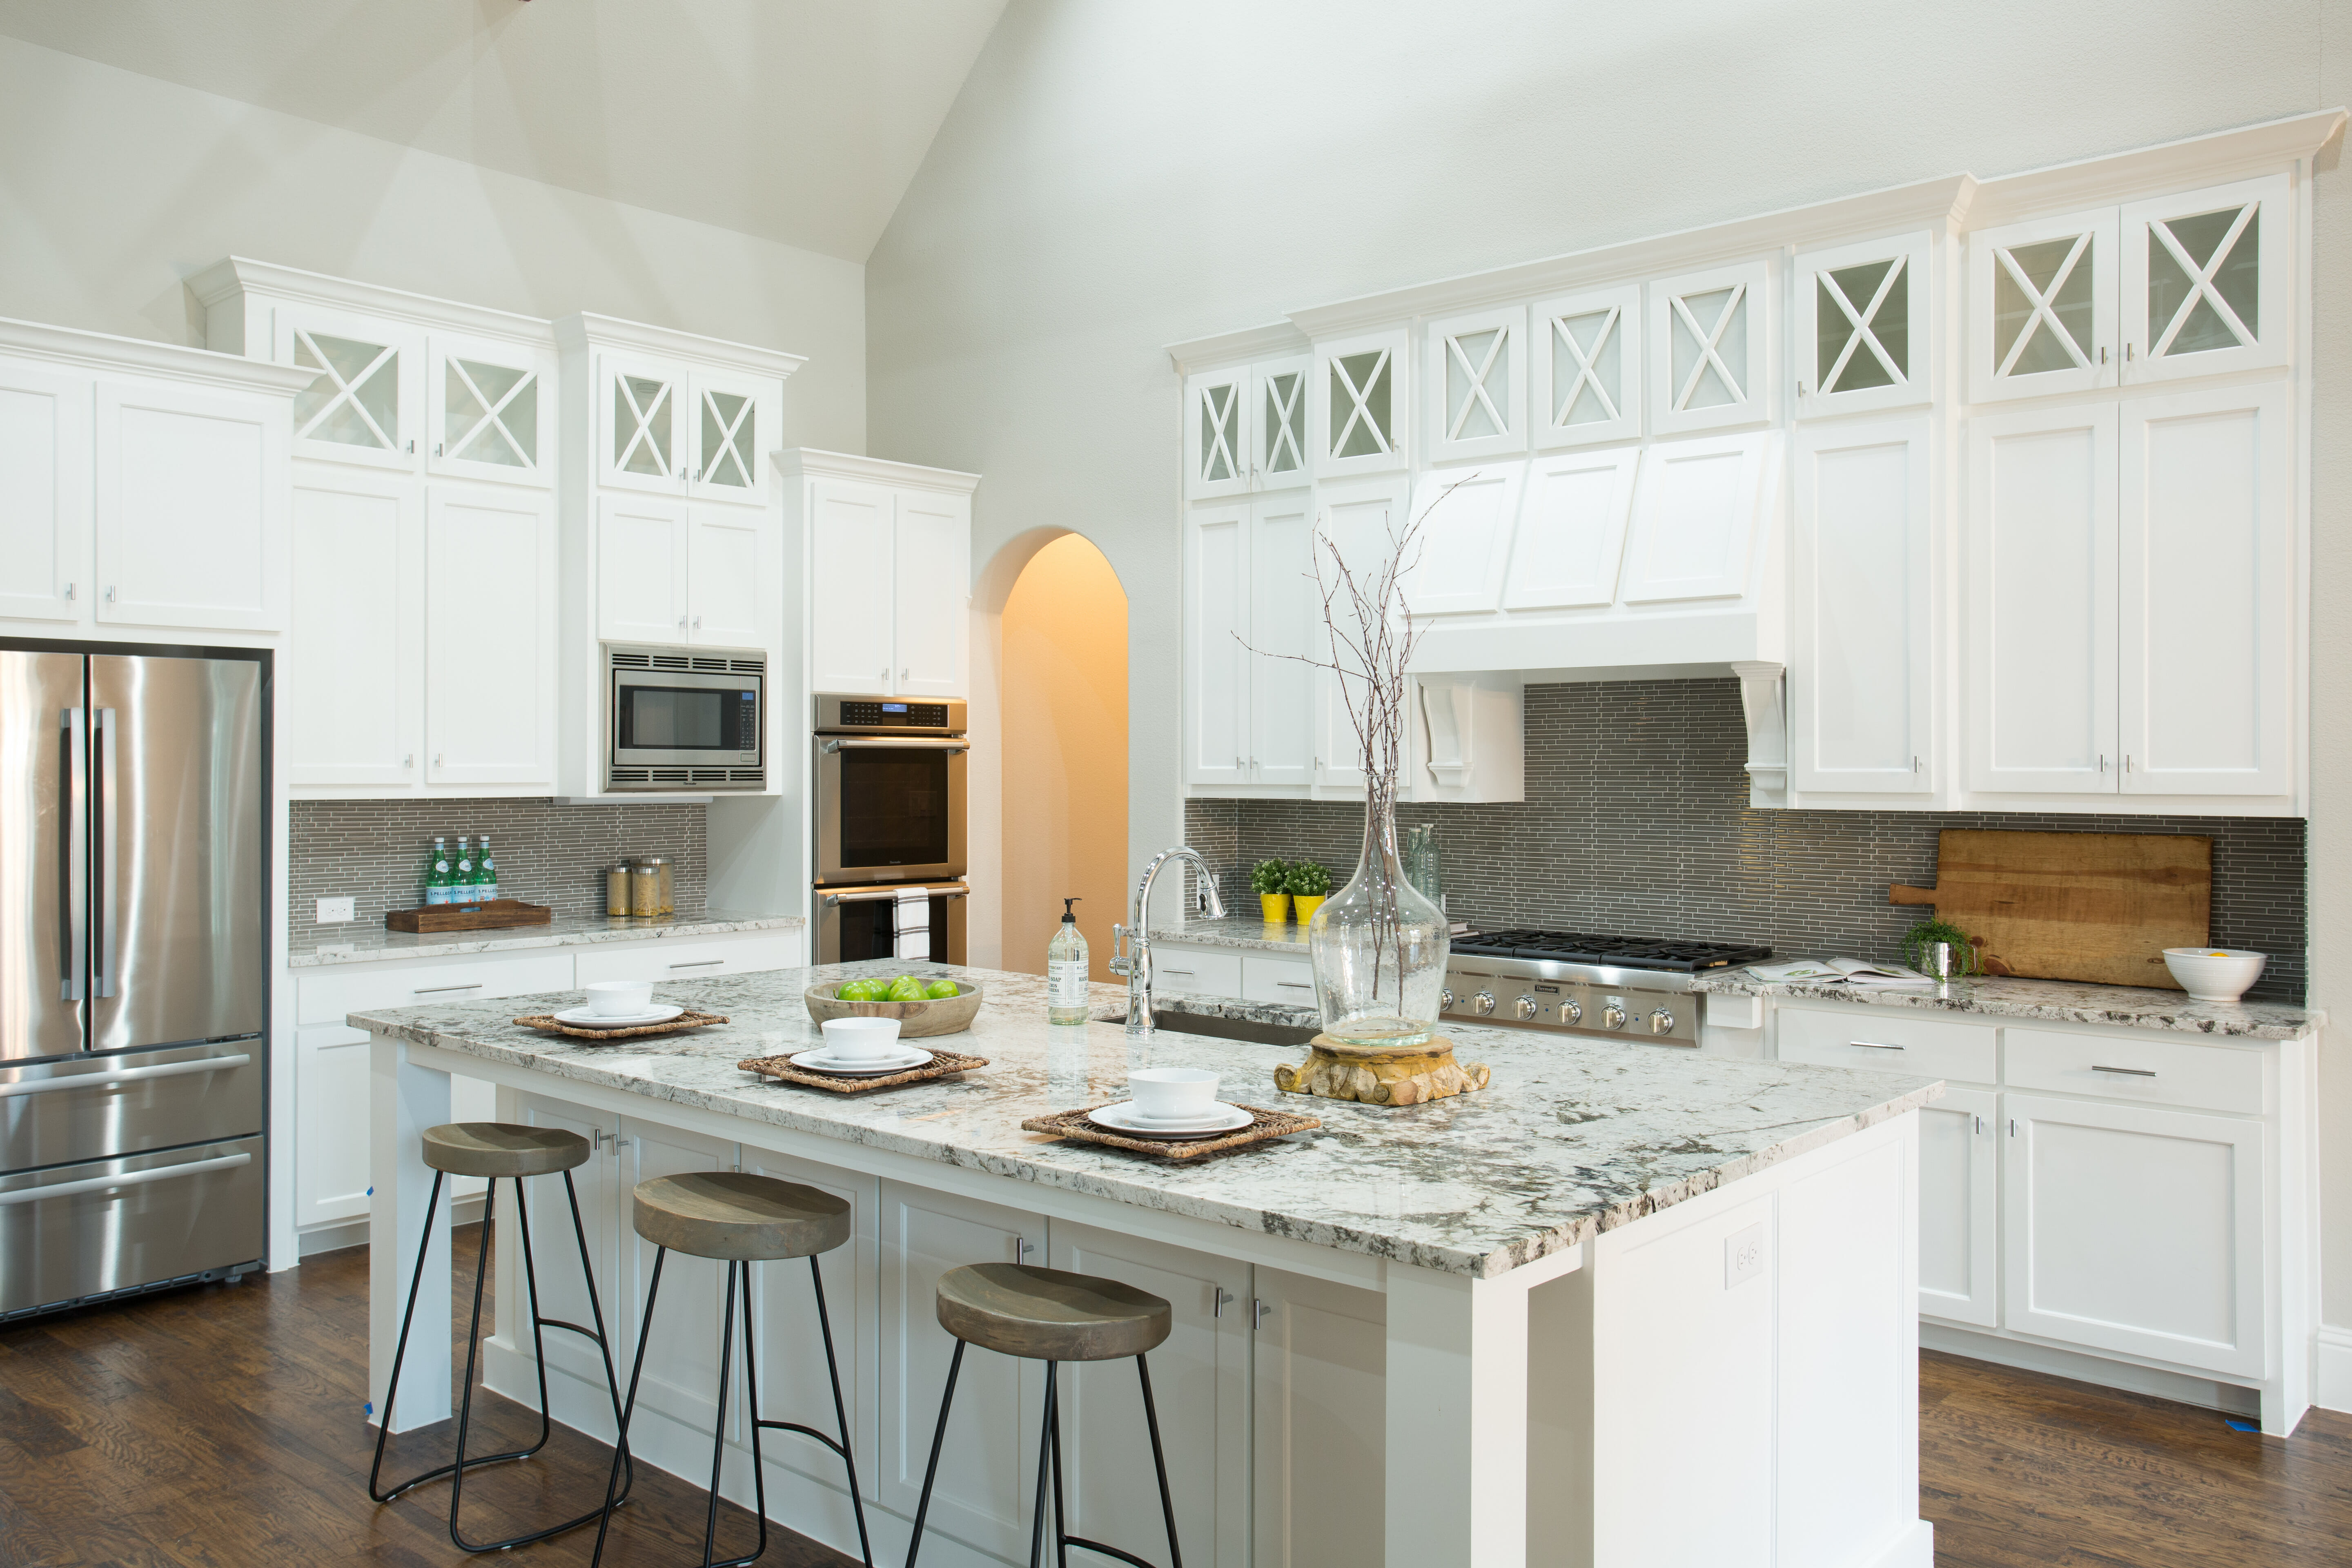
First let’s look at the height. I’m shooting much higher on my tripod, otherwise I would be shooting directly into the near side of the island. Notice that even though I’m shooting from a higher vantage point, the vertical lines are all still correct. The cabinets, island and fridge all appear 100% vertical.
This first shot is with the lights on. Notice how that far hallway has a bright orange hue coming from it? That’s just a result of a different color light bulb in that space. It’s pretty distracting. So in this instance, I would turn that hall light off.
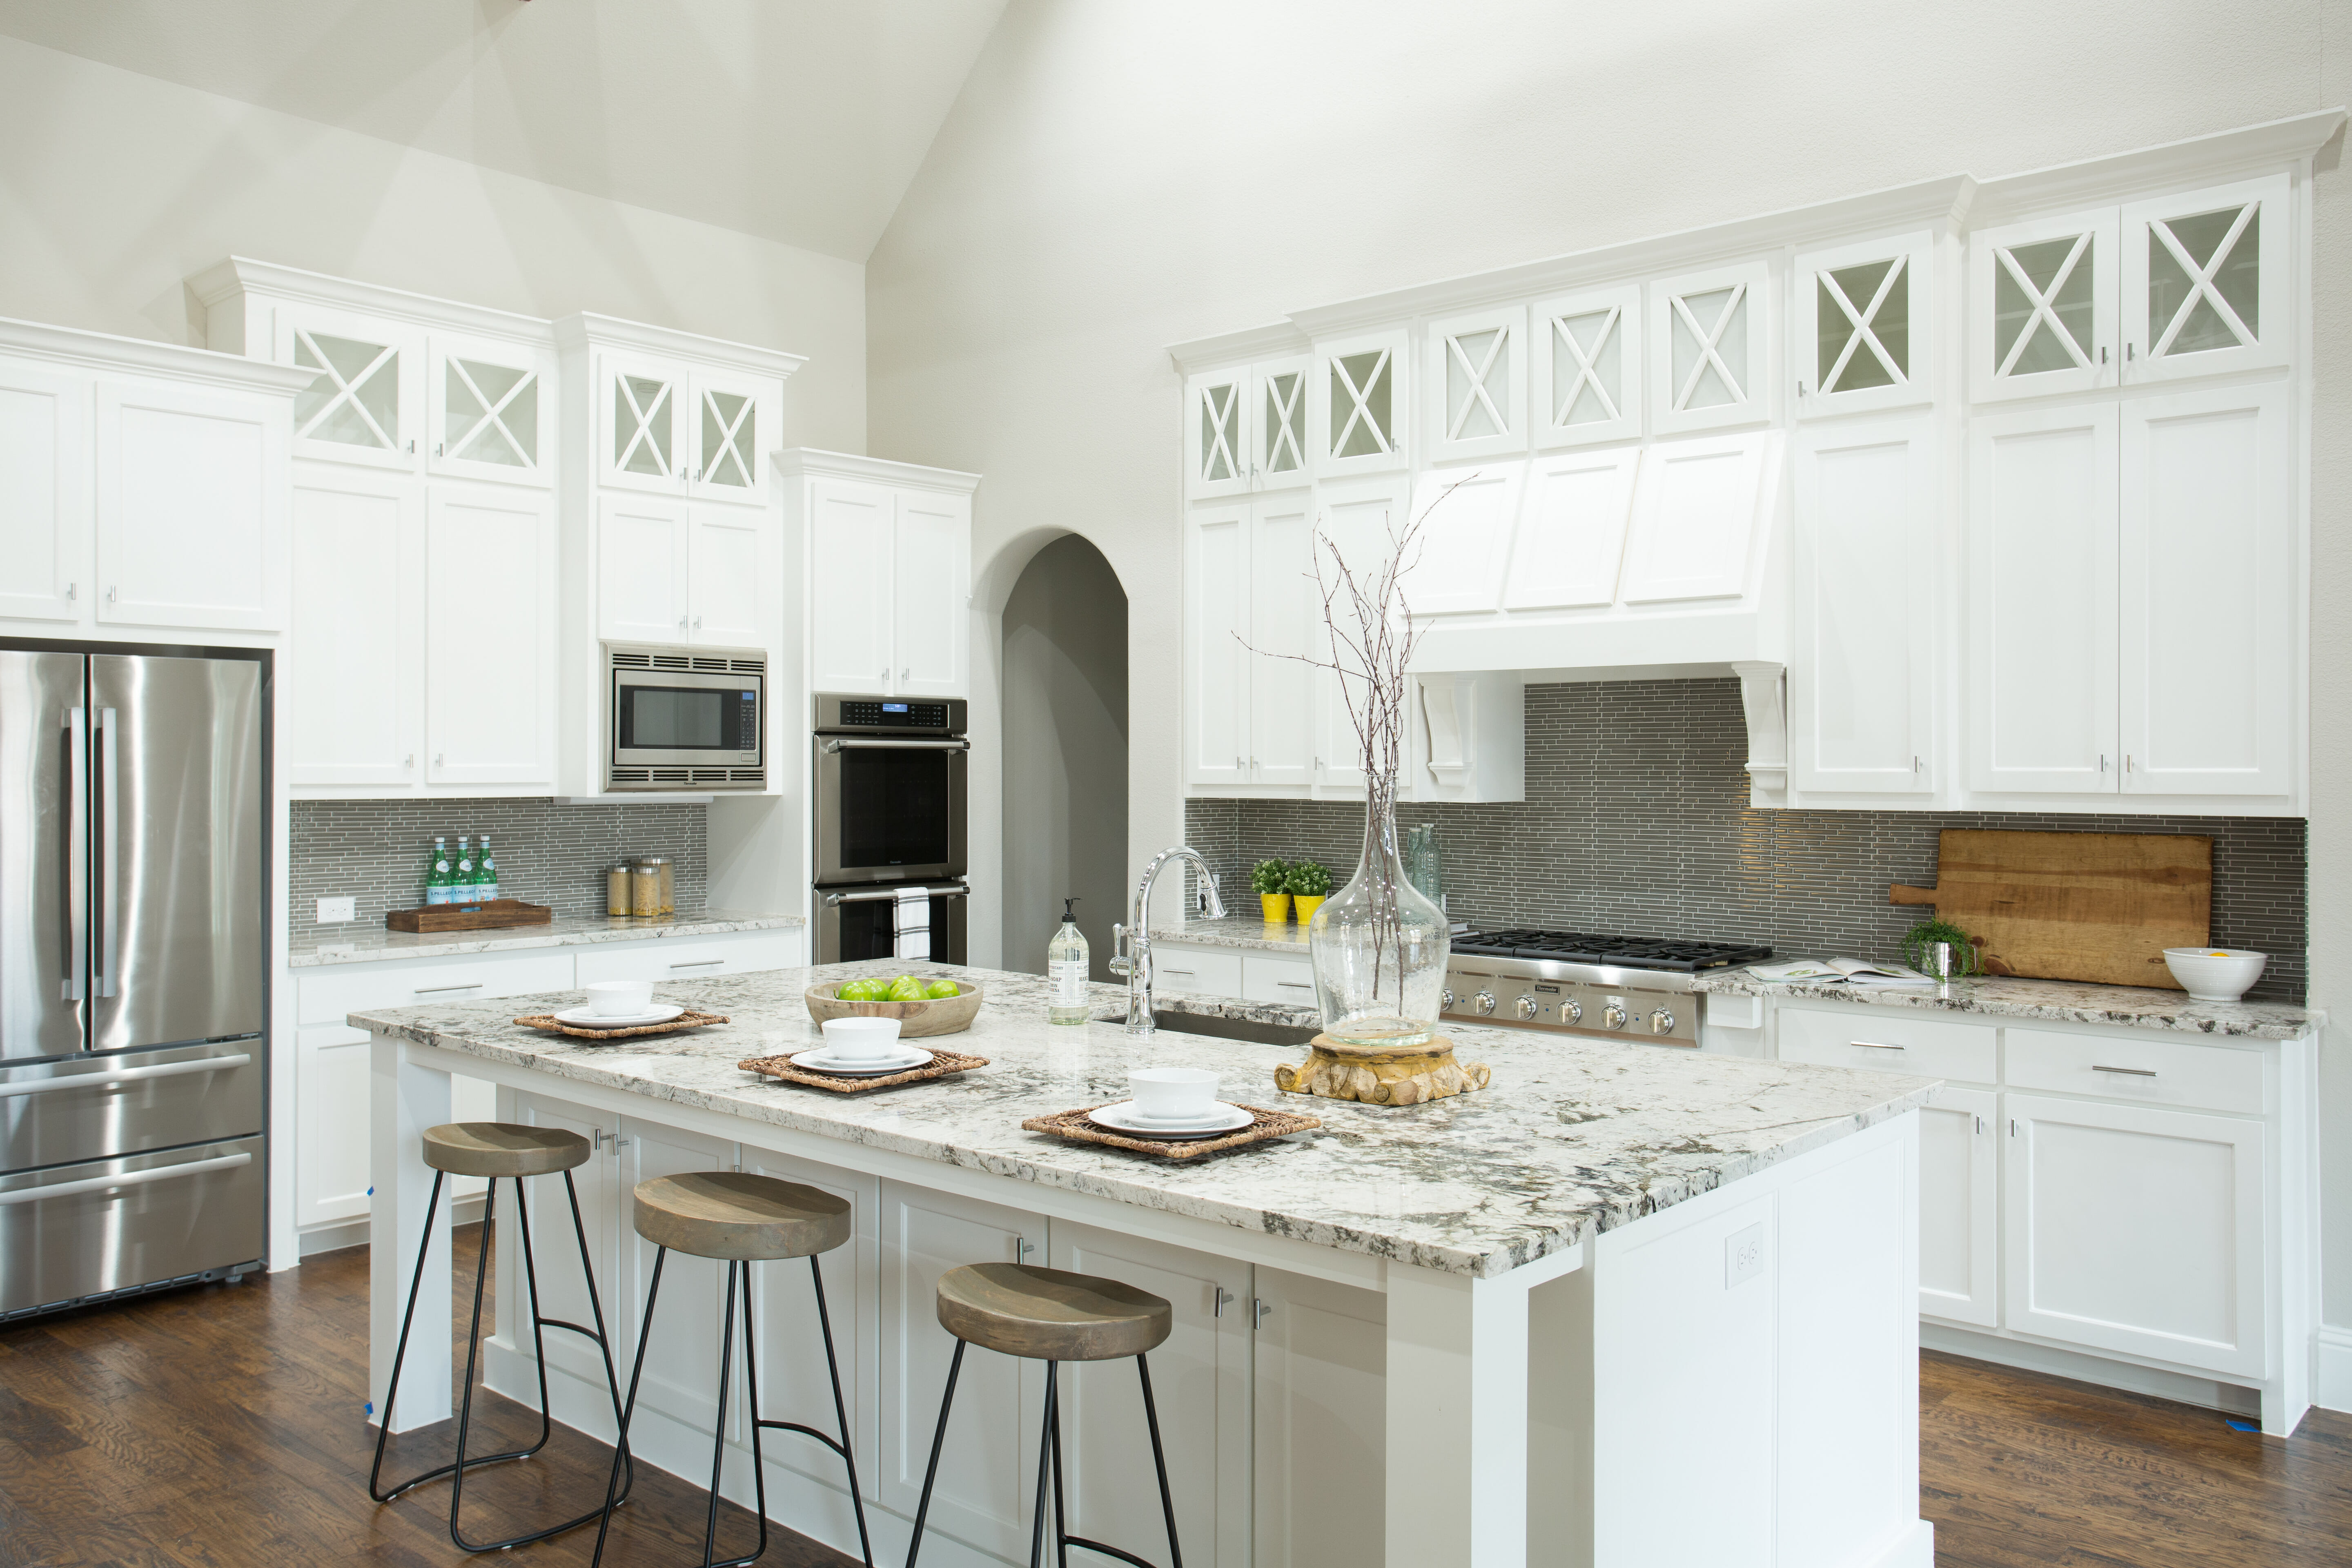
This looks much better in my opinion! So play with your interior lights being on/off. Remember by using exposure compensation on your camera, you can brighten up your photos even though you have turned lights off – as long as there are windows to bring in some of that ambient light from outdoors.
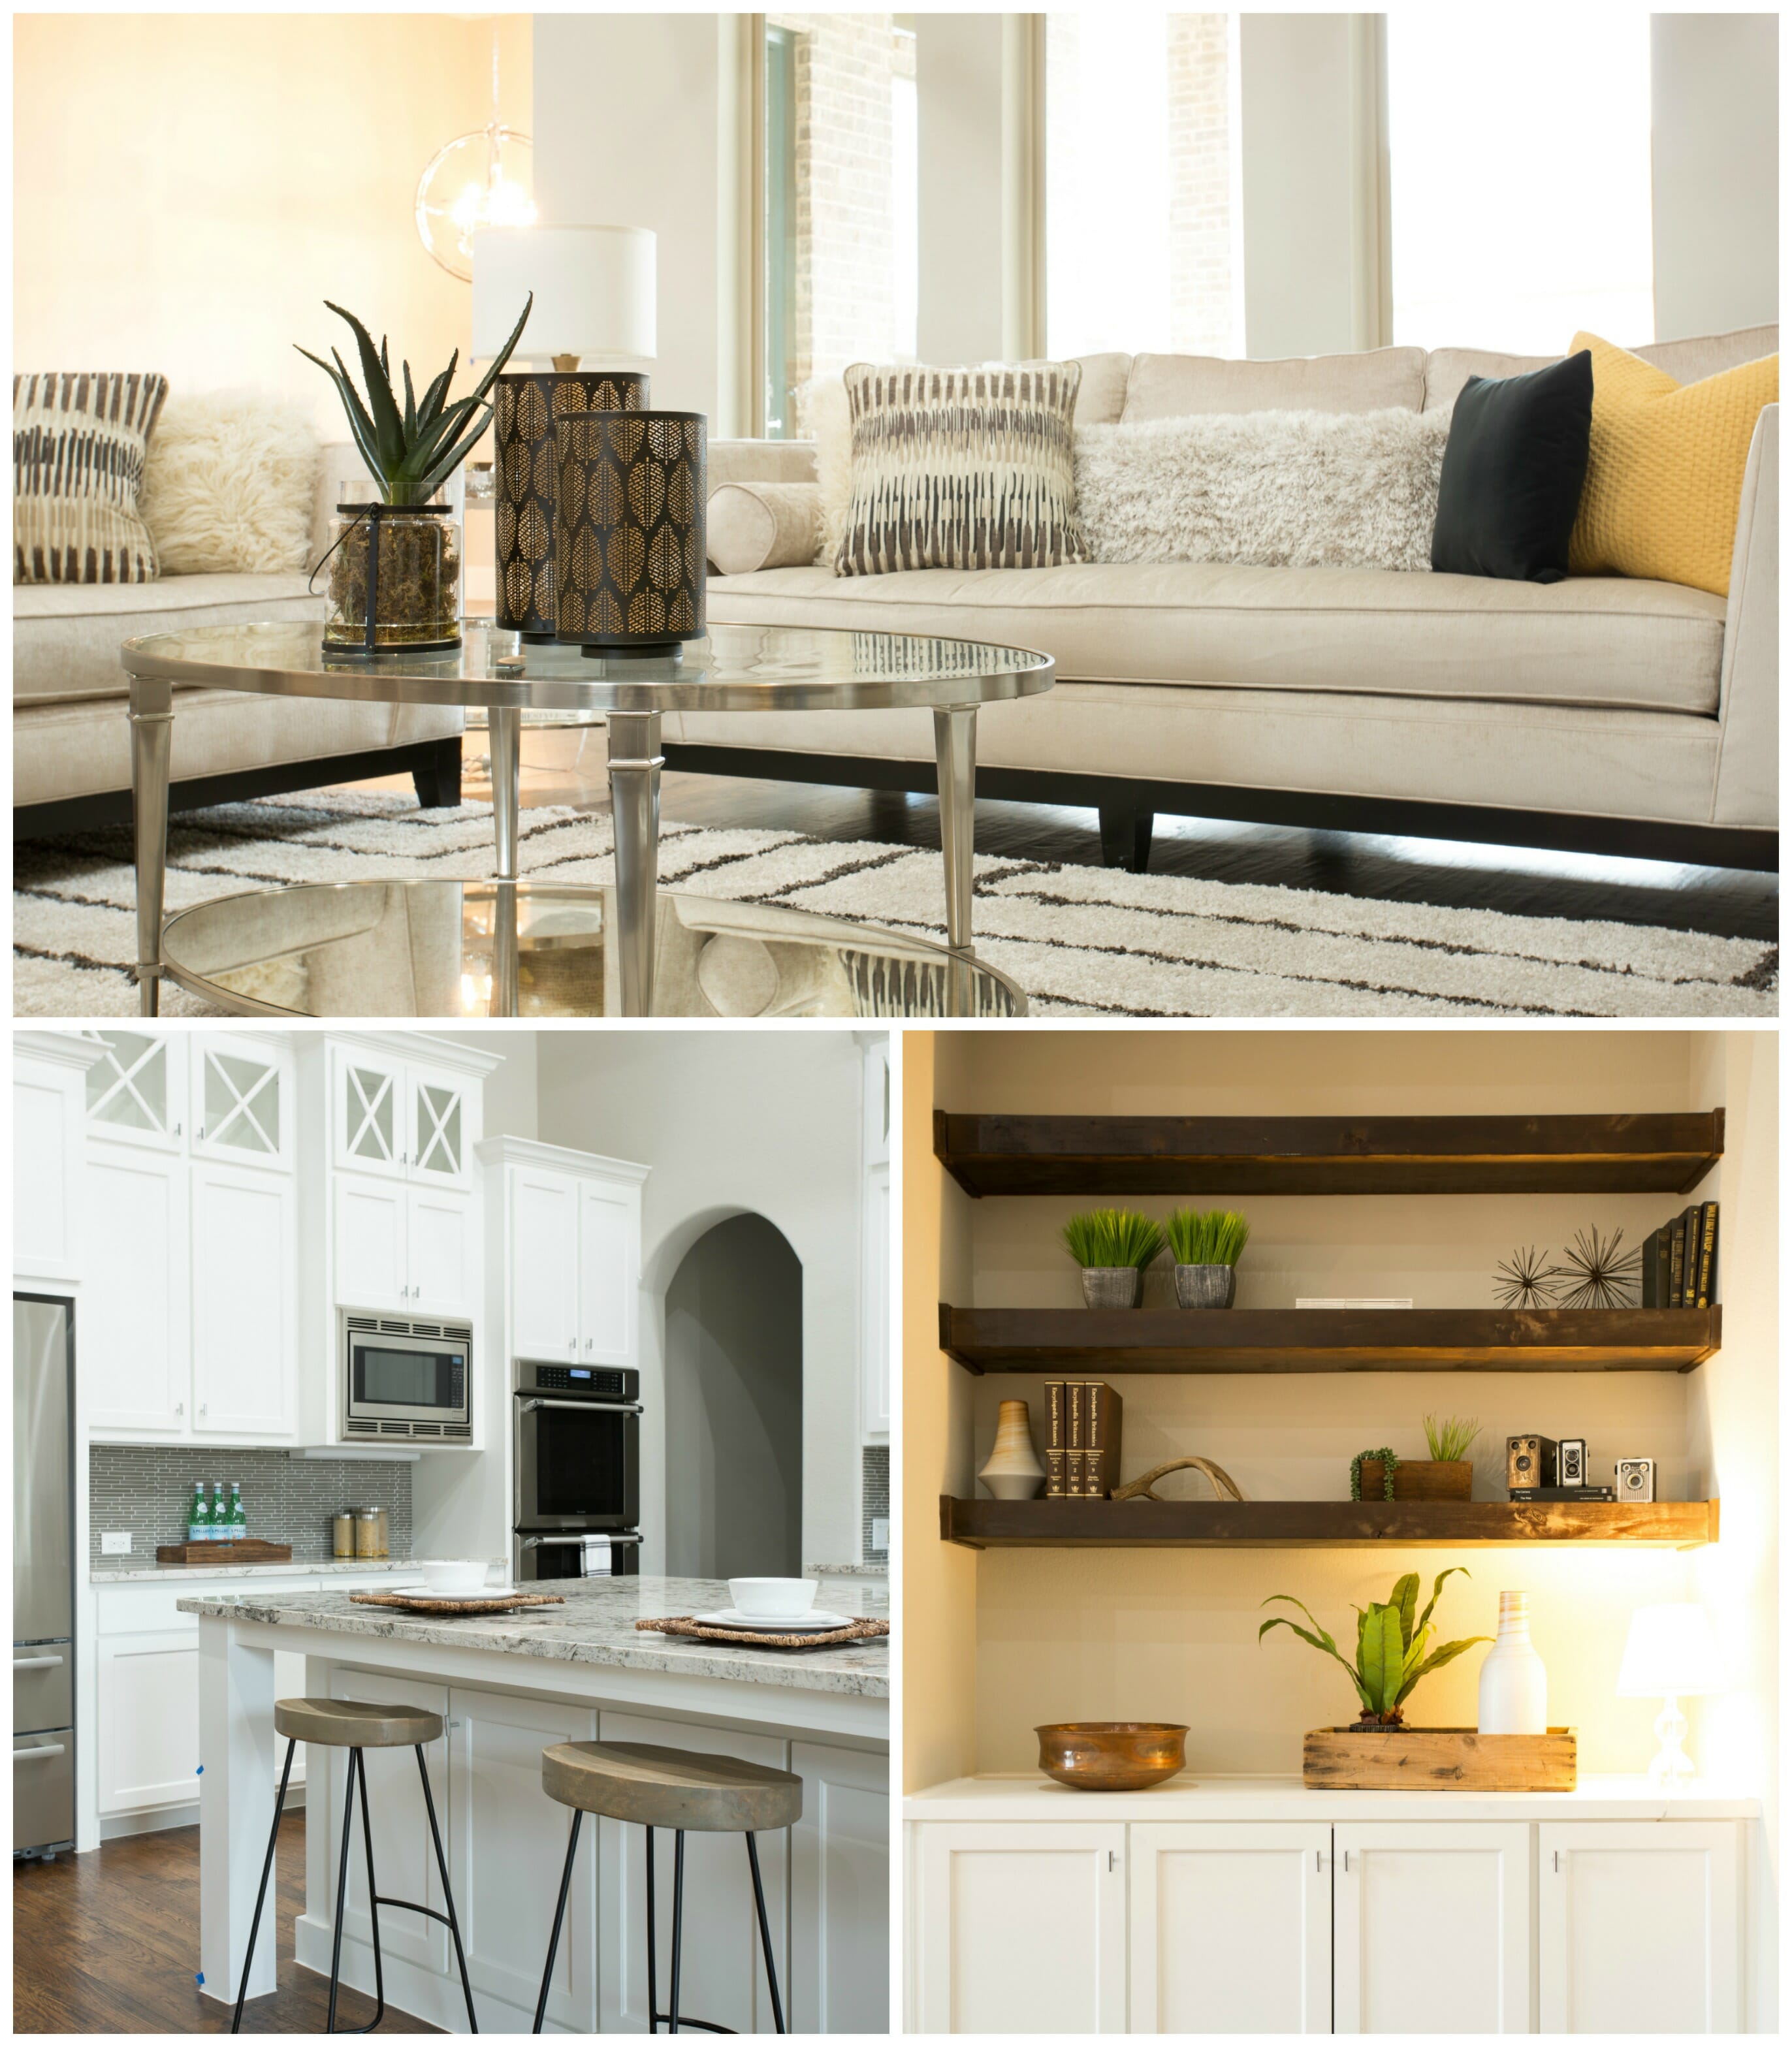
Vignettes / Other Angles
I love shooting vignettes for stagers! It helps to bring focus to their style and what they offer when a client hires them. Look for different angles or vignettes that will help define your style, and mix those in with your overall/wide photos to add interest. Vignettes also help to draw the viewer in and are a bit more emotional in my opinion. And they work great for social media!
Here are a couple of ideas of closeups/vignettes that I took. Don’t forget that you can also shoot vertical shots to show spaces that are more vertical oriented!
Using Your Phone
Do I think using your phone is a good idea for photos? Not generally. I definitely wouldn’t use my phone for portfolio photos that I’m sharing on my website! Those should be hired out by a professional. However we can still get some decent photos with our phone to share on social media, for sneak peeks of our work, etc. Here are some that I took with my iPhone.
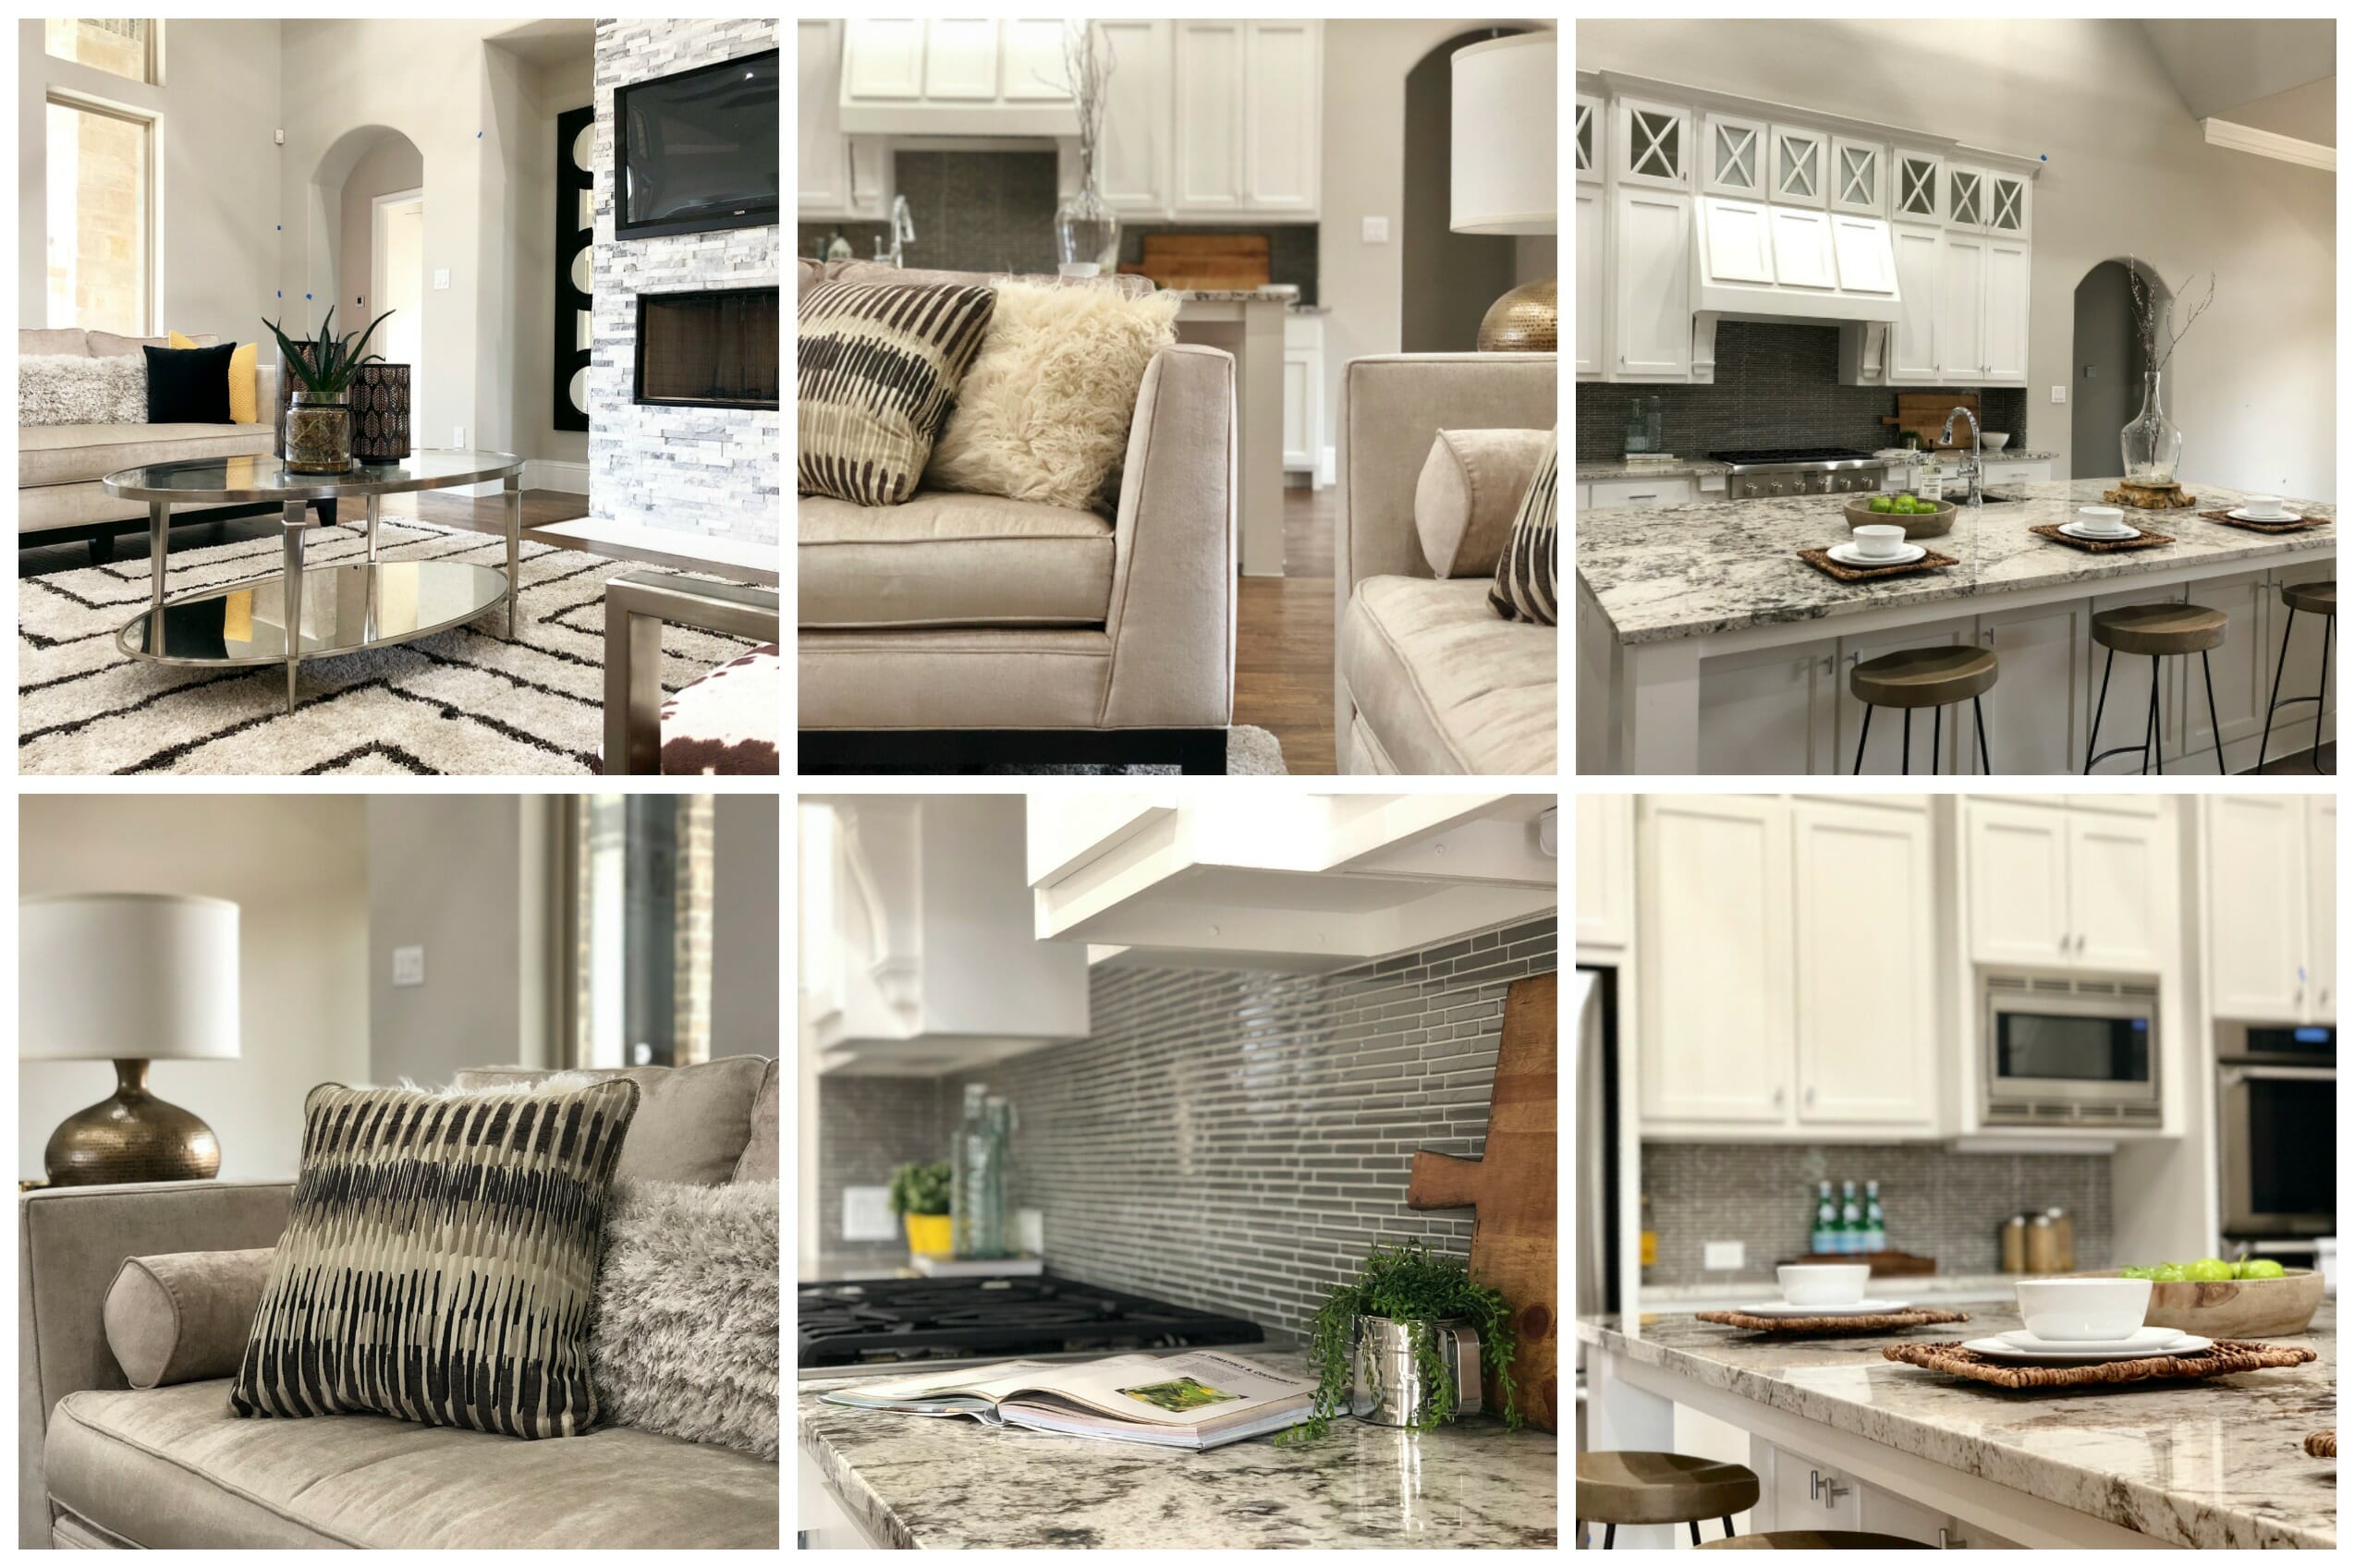
Did you know that with most phones, you can control how bright your photos are? If you open your camera app, most phones allow you to click somewhere in the frame to define a focus point. Usually when you do this a box pops up that also has a brightness indicator. You can hold down on your phone screen and drag up or down, to make the photo brighter or darker! This will help in challenging situations when the phone can’t figure out how to take the best photo, and behaves just like Exposure Compensation on your camera!
I hope you found these tips useful! Feel free to follow me on Instagram (@LanceUEP) to see photos of my work that I share regularly. You may get some ideas for angles, vignettes, etc!
Also a big thanks to Karen Otto of Home Star Staging for letting me take these photos of this staged property for this post.

- Photography Tips For Stagers - March 8, 2018
